Monday, November 11, 2024
How to Build a Pole Barn for Your Agricultural Business
Hey there, fellow farmhands! You're probably reading this because you're thinking about building a pole barn. Maybe you need more storage space, want to expand your livestock operation, or just want a sturdy, low-maintenance structure for your equipment. Whatever the reason, pole barns are a fantastic choice for your agricultural needs. They're affordable, customizable, and can be put up relatively quickly.
But before you start digging holes, let's break down everything you need to know about building your own pole barn. We'll cover the basics, from planning and permits to construction and finishing touches. By the end, you'll have a good grasp on what's involved and be ready to embark on your own pole barn adventure.
Step 1: The Dream Stage - Planning Your Pole Barn Paradise
Building a pole barn starts with a clear vision of what you want. Ask yourself:
What will it be used for? Storage, livestock, workshop, or a combination? This will determine the size, layout, and features needed.
Where will it be located on your property? Consider access, utilities, drainage, and the surrounding landscape.
What's your budget? Be realistic about what you can afford, and factor in costs for materials, labor, and permits.
What features are essential? Doors, windows, lighting, electrical outlets, insulation, and ventilation are all important considerations.
Step 2: Don't Be a Rebel Without a Permit!
Building anything on your property often requires permits from your local municipality. Contact your building department to find out the specific requirements for pole barns in your area. They might ask for:
Site plan: Shows the location of the barn on your property.
Building plans: Detailed drawings of the structure, including dimensions, materials, and building codes.
Engineering drawings: Especially important for larger structures, ensuring structural stability.
Environmental permits: Depending on location, you may need permits for soil erosion control or wetland mitigation.
Step 3: Finding a Foundation - Getting Ready to Build
The foundation is the heart of your pole barn. It's what keeps the whole structure standing tall and strong. Here's a rundown of the main options:
Concrete piers: The most common and durable option, providing a solid base for your poles. They involve digging holes, pouring concrete, and installing anchor bolts.
Steel posts: A faster and more cost-effective alternative, often used for smaller structures. They require less labor and provide a sturdy foundation.
Wood posts: A more traditional option, but they require proper treatment to prevent rot and decay. They are often less expensive than concrete or steel but may not be as durable.
Step 4: Choose Your Lumber - The Backbone of Your Barn
The poles that support your barn need to be strong and durable. The best wood for pole barn construction includes:
Southern Pine: Known for its strength and affordability.
Douglas Fir: Strong and durable, with a beautiful reddish-brown color.
Redwood: Naturally resistant to rot and decay, but more expensive than other options.
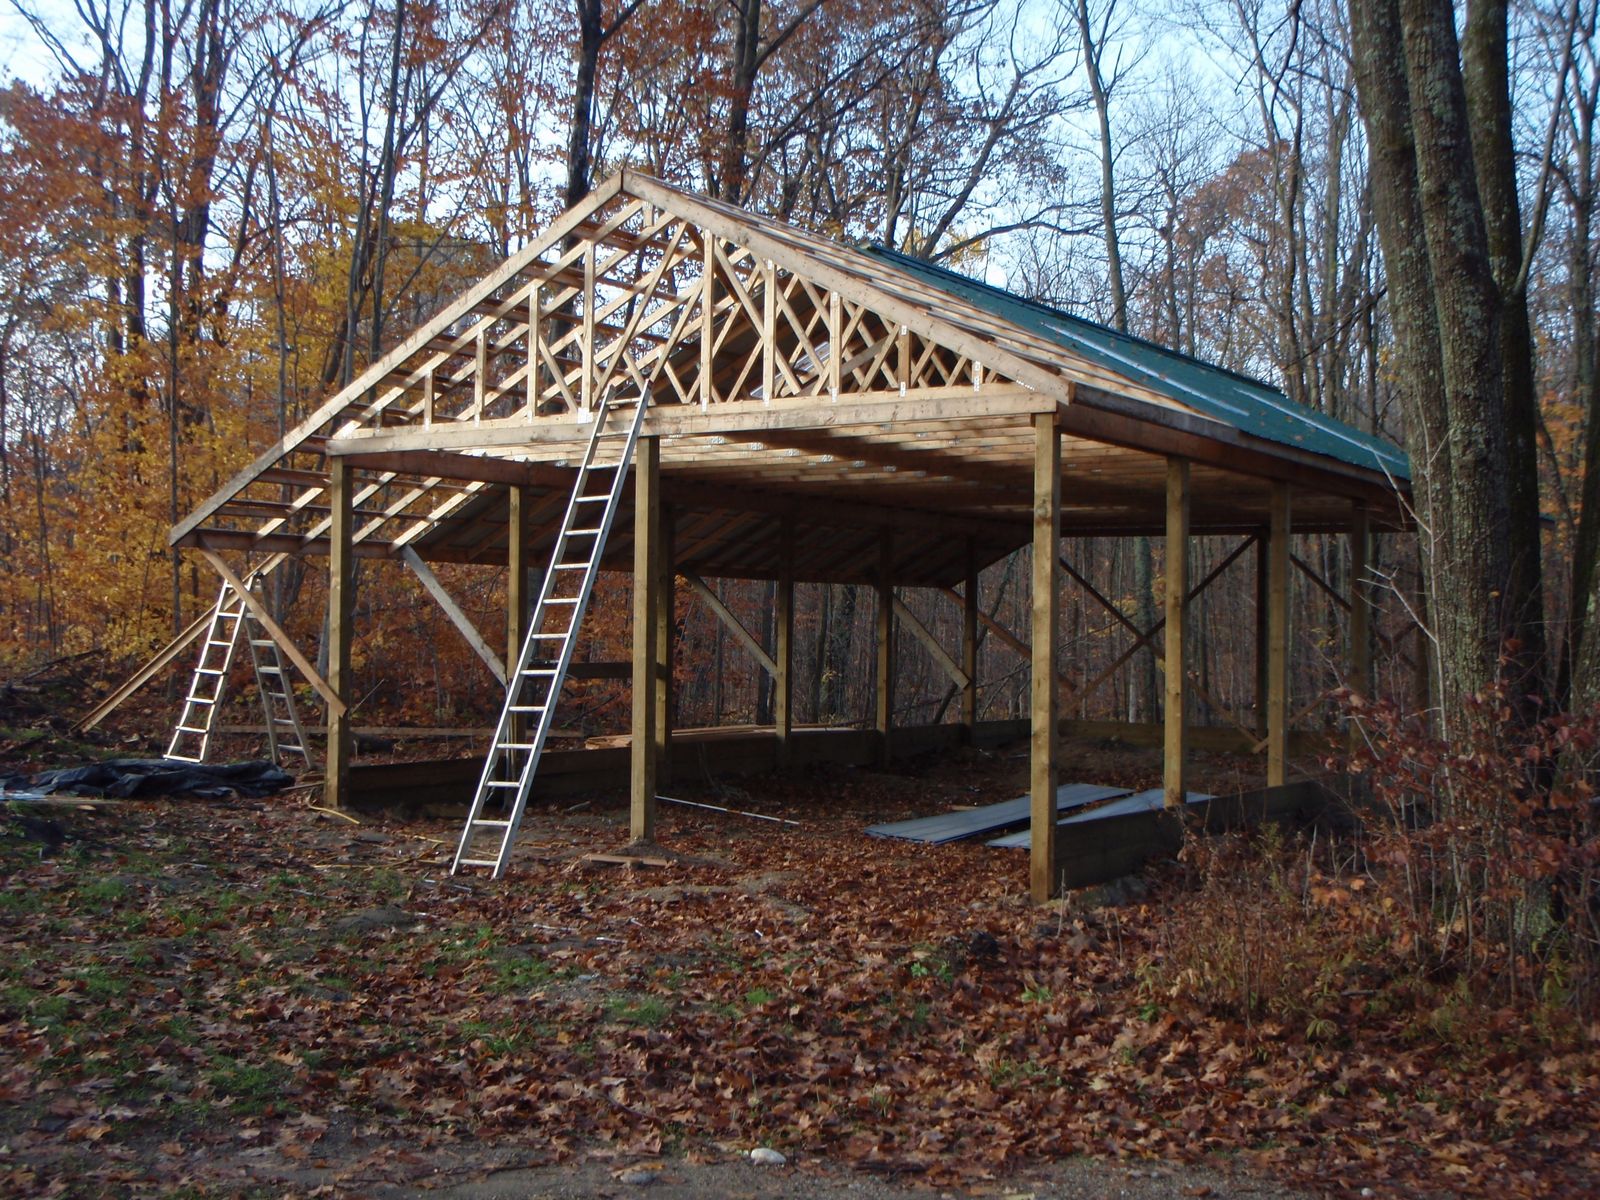
Step 5: Putting It Together - The Construction Phase
Now for the fun part! Here's a simplified overview of the construction process:
1. Erect the poles: This is where having a helper or two comes in handy. Carefully position the poles according to your plans and secure them to the foundation.
2. Build the frame: Connect the poles with beams and rafters to create the main structure of the barn.
3. Add the roof: Choose your preferred roof material, whether metal, shingles, or even a green roof for energy efficiency.
4. Install the siding: Finish the exterior of the barn with wood, metal, or any other siding material you choose.
5. Add the finishing touches: Install doors, windows, lights, electrical outlets, and any other desired features.
Step 6: Making it Homey - Interior Finishing and Extras
Once the shell is built, you can personalize the interior to meet your needs:
Insulation: Keeps your barn warm in winter and cool in summer, improving comfort and energy efficiency.
Flooring: Choose concrete, wood, or even a combination depending on your needs.
Ventilation: Important for livestock and for keeping the air fresh and preventing moisture build-up.
Lighting: Adequate lighting is essential for working and visibility.
Other features: Consider adding lofts for storage, stalls for animals, or a workshop space.
Step 7: It's Time to Celebrate - Enjoy Your New Pole Barn!
After all the hard work, you'll finally get to enjoy the fruits of your labor. Your new pole barn is ready to serve as a safe, sturdy, and versatile addition to your agricultural operation.
Bonus Tip: Seeking Professional Help
Building a pole barn is a significant project. While you can tackle many aspects yourself, don't hesitate to hire professional contractors for specific tasks, such as:
Foundation work: Ensuring a solid and properly installed foundation is critical.
Roofing: Hiring experienced roofers ensures proper installation and longevity.
Electrical work: Professional electricians can safely install wiring and electrical fixtures.
Conclusion
Building a pole barn is a fulfilling and rewarding endeavor. With careful planning, attention to detail, and a little elbow grease, you can create a structure that meets your agricultural needs for years to come. Remember, it's your farm, so make it your own. Choose materials you like, personalize the design, and enjoy the process of building your own "farm fortress."
Now, get out there and start planning!
No comments:
Post a Comment
Note: Only a member of this blog may post a comment.