Thursday, November 7, 2024
Easy steps to building a durable 12x16 shed
Alright, you want to build a shed, huh? A 12x16 shed, no less. That's a pretty good size for a workshop, storage, or even a little hangout spot. You're gonna need some time, some sweat, and maybe a few extra beers, but building a shed is way more rewarding than you think. Here's the breakdown to make it happen:
1. Planning and Preparation:
Before you jump into the thick of it, you gotta make a plan. Think about what you'll be using the shed for and what features you need.
Location: Where will you put it? Pick a spot that's level, has good drainage, and is close to power and water if needed. Think about how you'll get the materials to the site.
Foundation: This is crucial for a durable shed. You have a few choices:
Concrete Slab: Super durable, but a little more work.
Gravel Pad: Quick and easy, but less stable.
Pressure-Treated Skirts: Good for sloped ground.
Shed Style: You got your basic options:
Single-Slope: Simple and cheap, but less headroom.
Gable: Classic and gives you more headroom.
Hip: Sturdy and water-resistant.
Materials: Pick your poison:
Wood: Classic and relatively affordable.
Metal: Durable and low maintenance.
Vinyl: Sleek and low maintenance, but more expensive.
Tools: You'll need the basics:
Hammer
Tape measure
Level
Saw
Screwdriver
Drill
Safety glasses
Work gloves
2. Building the Foundation:
Concrete Slab: If you're going for a concrete slab, make sure you get the permits and call for inspections. Dig a hole, pour a gravel base, and then pour the concrete, letting it cure for a few days.
Gravel Pad: This is pretty easy. You'll need to level the ground and then lay down gravel, compacting it as you go.
Pressure-Treated Skirts: This is best for sloping ground. You'll lay down the pressure-treated lumber and level it, then secure it to the ground with concrete blocks or stakes.
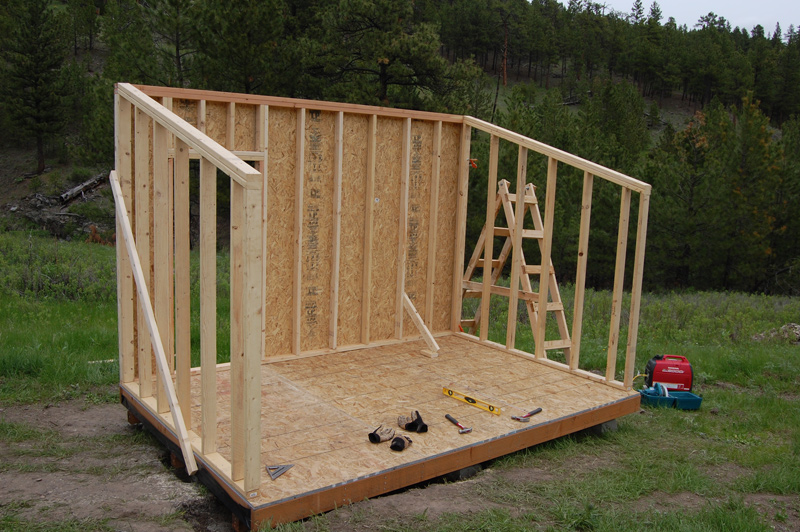
3. Framing the Walls:
Measure and Cut: Measure your walls accurately and cut the lumber for the wall studs. You'll typically use 2x4s for the studs.
Assemble the Walls: Nail the studs to the bottom plates and top plates, making sure everything is plumb and square.
Sheathing: Attach the sheathing (typically plywood) to the walls to provide stability and a surface for siding.
4. Framing the Roof:
Rafters: Cut and install the roof rafters, making sure they're spaced correctly. You can use a rafter square to help with this.
Sheathing: Attach the roof sheathing (plywood) to the rafters, making sure it's well-secured.
Roofing: Install the roofing material, whether it's shingles, metal, or another type.
5. Installing the Doors and Windows:
Measure and Cut: Measure the openings for the doors and windows accurately. You'll need to cut the wall framing to accommodate them.
Install the Frames: Install the door and window frames, making sure they're level and square.
Install the Doors and Windows: Hang the doors and install the windows, making sure they operate smoothly.
6. Finishing Touches:
Siding: Install the siding, whether it's wood, metal, or vinyl. Make sure it's installed securely and looks good.
Trim: Install the trim around the doors, windows, and rooflines.
Paint or Stain: Paint or stain the exterior of your shed to protect it from the elements.
7. Interior Finishes:
Flooring: Install flooring, whether it's wood, concrete, or another type.
Walls: Finish the walls, whether you want to paint them, add drywall, or leave them exposed.
Electrical and Plumbing: If you need electricity or plumbing in your shed, make sure you follow local codes and get permits.
Extra Tips:
Take Your Time: Building a shed is a process, not a race. Don't rush it.
Ask for Help: Don't be afraid to ask for help from friends, family, or professionals.
Double-Check: Double-check your measurements before you cut anything. It's easier to make sure everything is right before you start nailing it together.
Safety First: Wear safety glasses, work gloves, and appropriate clothing when working with power tools.
Enjoy the Process: Building a shed is a great way to learn new skills and enjoy the satisfaction of creating something with your own two hands.
Remember, building a shed is a project that can be as simple or as complex as you want it to be. Start with the basics, and you'll be amazed at what you can create. Just remember to have fun with it, and don't be afraid to get a little messy!
No comments:
Post a Comment
Note: Only a member of this blog may post a comment.