Thursday, November 7, 2024
Diy 8x12 shed: affordable plans for everyone
So, you're thinking about building a shed. Maybe you need a place to store tools, bikes, or garden supplies. Maybe you dream of a little workshop or even a tiny office space. Whatever your reason, an 8x12 shed is a perfect starting point. It's big enough to be useful, but small enough to be manageable for a weekend warrior like yourself.
The good news? You don't need to be a seasoned builder to tackle this project. With a little planning, some basic tools, and a whole lot of enthusiasm, you can build your own shed for a fraction of the cost of hiring someone else.
Where to Start: Planning Your Shed Project
Before you start throwing lumber around, take a deep breath and let's create a solid plan.
Location, Location, Location: Where will your shed live? Consider sunlight, drainage, and proximity to your house. You'll need to check your local building codes to make sure your shed is properly placed and permitted.
Foundation, Foundation, Foundation: This is the unsung hero of your shed. A solid foundation will keep your structure level and prevent it from sinking. You can choose from concrete pads, treated lumber piers, or even gravel pads.
Design Inspiration: Browse some plans online! There are tons of free resources available, from simple designs to more elaborate structures.
Materials, Materials, Materials: This is where you can really save some money. Don't be afraid to shop around! Lumber prices fluctuate, and you can often find deals at different home improvement stores.
Choosing the Right Materials: Getting the Best Bang for Your Buck
The materials you choose can make a big difference in your project's cost. Here's a breakdown of common options:
Lumber: Pressure-treated lumber is a must for your foundation and floor joists. It resists rot and insects, making it a smart investment. For the walls and roof, you can use standard framing lumber. Don't be afraid to ask for a discount on seconds or rough-cut lumber.
Roofing: Asphalt shingles are the most affordable option. Metal roofing is more durable and energy-efficient, but comes with a higher price tag.
Siding: Vinyl siding is budget-friendly and easy to install. If you want a more rustic look, consider using wood siding or even corrugated metal.
Windows and Doors: Standard pre-hung doors and windows are the most cost-effective.
Hardware: Don't skimp on quality hardware like hinges, handles, and fasteners. You want your shed to last!
Let's Get Building: Step-by-Step Construction
Once you have your materials and your plan is set, it's time to get building!
1. Prepare the Site: Clear the area, mark out your foundation, and level it. You'll need to dig holes for piers or pour concrete for your foundation.
2. Build the Foundation: Follow the instructions for your chosen foundation type. Don't forget to check for level!
3. Frame the Floor: Attach pressure-treated floor joists to your foundation. Remember to use joist hangers for a strong connection.
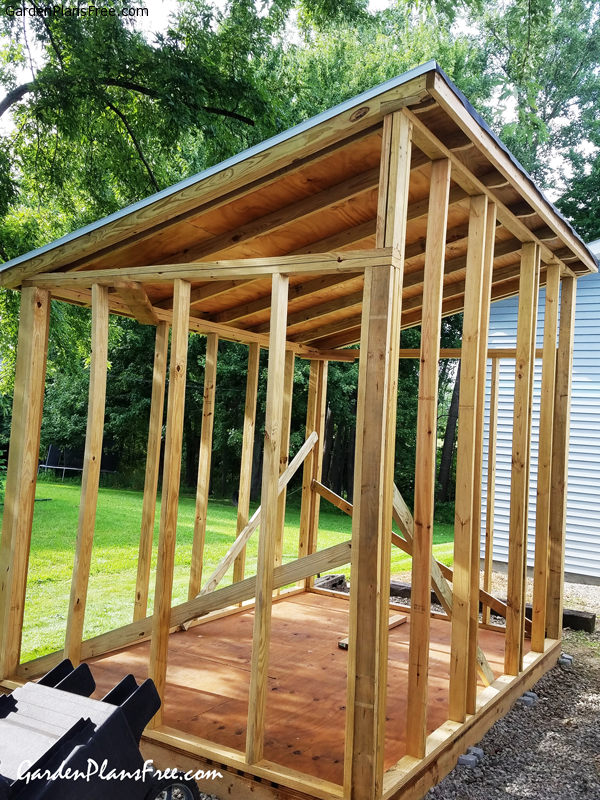
4. Install the Walls: Cut and assemble your wall frames. You can choose to use traditional stud construction or consider a more affordable method like tongue and groove boards.
5. Erect the Walls: Carefully lift and secure your walls to the floor frame. Check that they are plumb and level.
6. Install the Roof Trusses: Depending on the size of your shed, you may need roof trusses for support.
7. Sheathe the Roof: Cover the trusses with plywood or OSB sheathing.
8. Install Roofing: Attach your chosen roofing material, ensuring it overlaps properly.
9. Side It Up: Install your siding, using nails or screws to secure it to the framing.
10. Add Windows and Doors: Cut openings for your windows and doors and carefully install them.
11. Finishing Touches: Install trim, paint or stain the exterior, and add any necessary hardware like handles and hinges.
Essential Tools for the Job
To tackle this project, you'll need a few key tools:
Measuring tape: A must-have for accurate cuts.
Level: To ensure everything is straight and level.
Circular saw: For cutting lumber.
Hammer: For driving nails.
Screwdriver: For attaching screws.
Drill: For making holes and driving screws.
Safety gear: Always wear safety glasses, gloves, and hearing protection.
Building Your Dream Shed on a Budget
Building a shed yourself is a great way to save money, but there are some additional ways to keep your costs down:
Shop around for deals: Compare prices at different home improvement stores and lumber yards.
Use recycled materials: Check your local Craigslist or Habitat for Humanity ReStore for used building materials.
Barter your skills: Offer to help a friend with a project in exchange for materials or labor.
Do it yourself: Try to avoid hiring contractors for any tasks that you can handle yourself.
Remember: Building a shed is a rewarding experience, but it's also a lot of work. Don't be afraid to ask for help from friends or family. And most importantly, have fun!
Going Beyond the Basics: Adding Extra Features
Once you have your basic shed built, the sky's the limit for adding features. Consider these ideas:
Shelving: Install shelves for easy storage.
Workbenches: Create a dedicated workspace for DIY projects.
Electricity: Add wiring for lights, outlets, or even a small heater.
Insulation: Keep your shed comfortable with insulation in the walls and roof.
Tips for Success:
Read the instructions carefully: Make sure you understand the steps before you start building.
Take your time: Don't rush the process. Quality work will pay off in the long run.
Ask for help: Don't be afraid to enlist help from friends or family, especially for lifting heavy objects.
Celebrate your accomplishments: Enjoy the satisfaction of building your own shed!
With a little planning, some hard work, and a dash of creativity, you can build your own 8x12 shed that you'll love for years to come. Remember, it's your project, so let your personality shine through! Good luck!
No comments:
Post a Comment
Note: Only a member of this blog may post a comment.