Sunday, November 10, 2024
Essential tips for building a 10x12 garden shed yourself
Alright, so you’re ready to build a 10x12 garden shed. Good for you! It's a fantastic project, and you'll be so proud of yourself when you're done. Plus, you'll have a fantastic space for your tools, bikes, and all those garden goodies. But before you dive in headfirst, let's talk about the essentials to make this project smooth sailing.
### 1. Planning is Key: Getting Your Ducks in a Row
First things first, planning. You wouldn't build a house without a blueprint, right? Same goes for your shed. Think about the shed's purpose - will it be just for storage, a workshop, or maybe even a tiny office?
Get Inspired: Browse online for ideas, check out your local building supply store, or even visit a friend's shed. Look for features you like, like windows, doors, and even shelves.
Draw it Out: A simple sketch is a must. Measure your space to make sure your shed fits, and consider how you'll access it - will you need a ramp or stairs?
Materials and Budget: This is crucial. Figure out what kind of wood you want to use, think about siding and roofing, and get an estimate for the cost of everything. Don't forget about tools - you might need to buy some, but maybe you can borrow from a neighbor.
### 2. Foundation: The Unsung Hero
Now, the foundation is the base of your entire shed, so don't skimp here. There are a few options:
Concrete Slab: This is the strongest and most durable choice, but it's also the most expensive and time-consuming.
Concrete Blocks: A bit more affordable, these are laid in a pattern, and you can even use them for extra storage space later.
Pressure-Treated Skirts: Perfect for a simpler foundation, these wood timbers are set in the ground and create a sturdy base.
Whatever you choose, make sure the foundation is level! You can use a level or even a spirit level to get it just right.
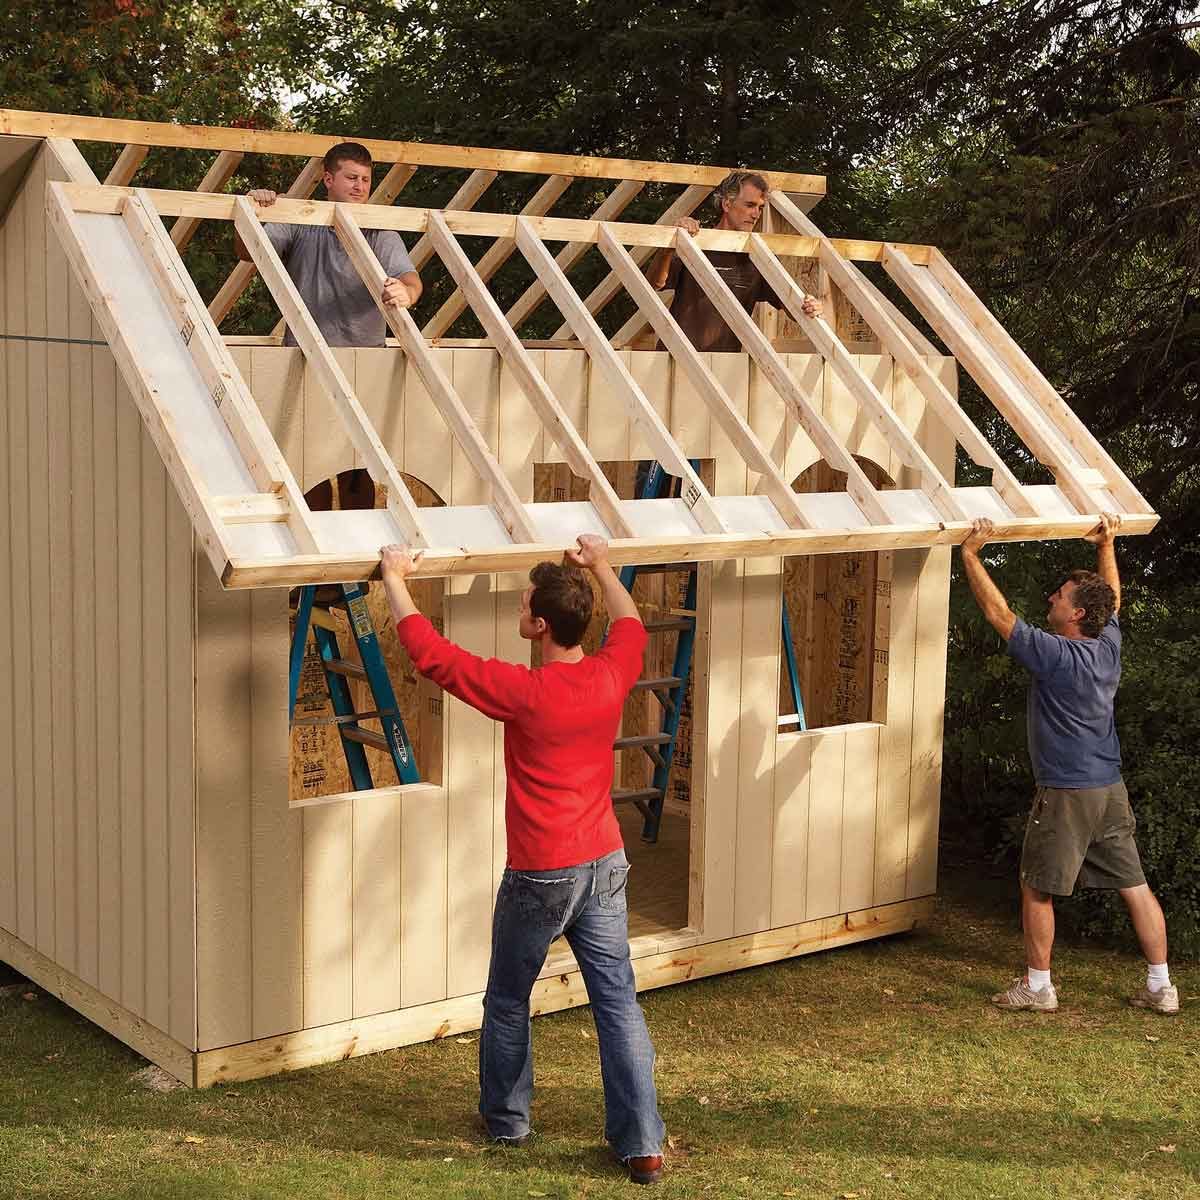
### 3. The Frame: Building the Bones
This is where the fun begins! The frame is the heart of your shed, and it needs to be strong and square. Here's the deal:
Get Your Wood: Pressure-treated lumber for the base, dimensional lumber for the walls and roof. Use treated lumber for anything that will be in contact with the ground.
Build the Floor: Start by building the floor frame, using joists (long pieces of lumber) and stringers (shorter pieces to support the joists). Make sure it's super sturdy!
Wall Framing: Use studs (the vertical pieces of wood that make up the walls) and plates (the horizontal pieces that connect the studs). Remember to add bracing for extra strength.
Roof Framing: For a simple shed, a gable roof is perfect. Use rafters to create the slope, and make sure you have enough overhang for rain.
Take your time, check your measurements, and use a level and square to make sure everything is straight and square!
### 4. Sheathing: Protecting Your Structure
The sheathing is basically the skin of your shed. It goes over the frame and helps hold everything together.
OSB Sheathing: This is the most common type of sheathing, affordable and strong. It's like a giant sheet of plywood but less expensive.
Plywood Sheathing: Stronger and more durable, plywood sheathing is also slightly more expensive.
Make sure you nail the sheathing properly to the frame.
### 5. Siding and Roofing: The Finishing Touches
Now, it's time for the fun part - giving your shed its personality!
Siding: Choose a material that matches your style and budget. Wood, vinyl, metal, and fiber cement are all popular choices.
Roofing: Shingles are common and easy to install, but you can also use metal or even rubber roofing. Don't forget to add flashing to protect against water leaks.
### 6. Doors and Windows: Let There Be Light
Adding doors and windows brings your shed to life. You'll need:
Door Frame: Use a pre-hung door for ease of installation. A double door is perfect for larger sheds.
Window Frames: Consider windows on different walls for ventilation and natural light.
Make sure you install everything securely and seal any gaps to prevent drafts.
### 7. Interior Finish: Putting the Finishing Touches
Almost there! The last step is the interior:
Insulation: Consider insulation to make your shed more comfortable and energy-efficient. Fiberglass or spray foam insulation are great options.
Drywall: You can add drywall to the walls and ceiling for a smoother finish and easier painting.
Flooring: Choose a flooring that suits your needs. Concrete, vinyl tiles, or even wood flooring are all great options.
### 8. The Finishing Touches: Making it Your Own
Now, it's time to personalize your shed!
Paint or Stain: Give your shed a fresh look with paint or stain. Choose colors that complement your home or your garden.
Lighting: Add light fixtures for safety and convenience.
Shelves, Hooks, and Storage: Organize your space with shelves, hooks, and other storage solutions.
### 9. Safety First: Stay Safe and Sound
Building a shed can be a fun and rewarding experience, but it's crucial to prioritize safety:
Wear Safety Glasses: Protect your eyes from debris.
Use Hearing Protection: Power tools can be loud, so protect your ears.
Work with a Helper: Having someone assist you can be helpful, especially for lifting heavy objects.
### 10. Enjoy Your New Space!
Congratulations! You've built a fantastic shed! Enjoy the fruits of your labor and revel in your new space. Maybe even celebrate with a barbecue in your beautiful backyard. Now, go forth and shed those worries!
No comments:
Post a Comment
Note: Only a member of this blog may post a comment.