Sunday, November 10, 2024
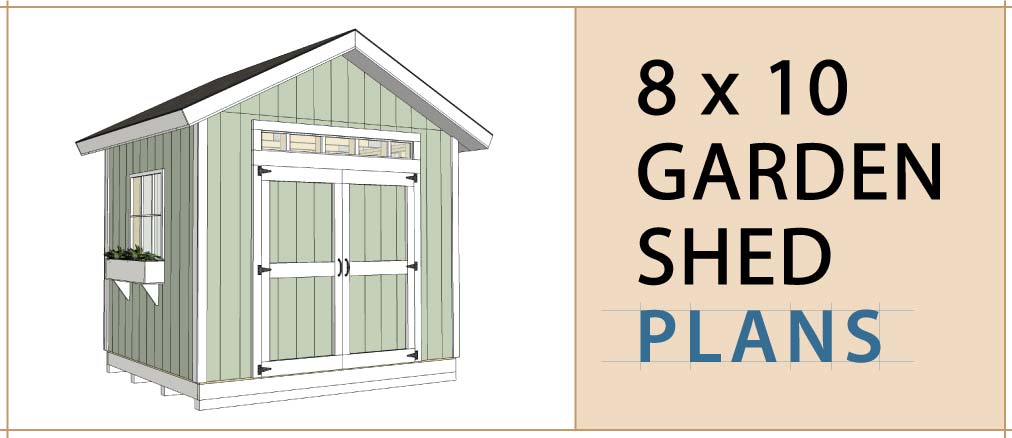
Affordable 8x10 shed plans with step-by-step diy instructions
Hey there, fellow DIYer! Tired of clutter taking over your garage or basement? Dreaming of a tidy space to store your tools, bikes, or gardening supplies? Building a small shed can be the perfect solution, and the best part is, it doesn't have to break the bank.
This guide will walk you through building an 8x10 shed on a budget, with clear step-by-step instructions and tips for maximizing your savings. We'll cover everything from materials and tools to building techniques, making sure even a beginner can tackle this project with confidence.
Let's Get Started!
Planning Your Shed
Before you start grabbing tools, it's crucial to have a solid plan. Here are the key factors to consider:
Location, Location, Location: Choose a spot for your shed that's level, accessible, and preferably close to a power source if you plan on adding electricity. Remember to check local building codes for setbacks and permits.
Foundation: A concrete slab is the most durable, but it can be expensive. For budget-friendly options, consider a gravel base or even pressure-treated lumber skids.
Style: Do you prefer a simple gable roof or a more complex shed with a Dutch door? Think about your storage needs and aesthetic preferences.
Material Choices: Pressure-treated lumber for the foundation and floor joists is essential for durability. You can save money by using standard lumber for the walls and roof.
Gather Your Materials
Here's a list of essential materials for a basic 8x10 shed:
Lumber:
Pressure-treated lumber for the foundation (2x6 or 2x8)
2x4 lumber for the walls, roof framing, and interior supports
1/2-inch plywood for the walls, roof sheathing, and floor
Hardware:
Roofing felt
Shingles (asphalt, metal, or composite)
Exterior siding (vinyl, wood, or fiber cement)
Windows (optional)
Door (single or double)
Screws, nails, and staples
Other:
Concrete mix (for a concrete slab foundation)
Gravel (for a gravel base)
Paint (for exterior and interior)
DIY Tools for the Job
You'll need the following tools for this project:
Power Tools:
Circular saw or miter saw
Drill/driver
Hammer
Nail gun (optional)
Staple gun
Hand Tools:
Measuring tape
Level
Pencil
Safety glasses
Work gloves
Claw hammer
Pry bar
Step-by-Step Construction Guide
Now that you have your materials and tools, let's get building!
1. Foundation:
Concrete Slab: Follow the manufacturer's instructions for mixing and pouring concrete. Ensure a level surface.
Gravel Base: Lay down a layer of gravel, compact it, and level it out.
Pressure-Treated Skids: Construct a frame using pressure-treated lumber for the foundation.
2. Floor Framing:
Measure and cut: Cut 2x4s to create floor joists, spaced 16 inches apart.
Attach: Attach the joists to the foundation using screws or nails.
Plywood: Lay plywood over the joists, securing it with screws or nails.
3. Walls:
Frame: Cut 2x4s to create wall studs, spaced 16 inches apart.
Connect: Attach the studs to the floor framing using screws or nails. Use a level to ensure they are plumb.
Top Plate: Connect the studs with a top plate to form the wall assembly.
4. Roof Framing:
Rafters: Cut 2x4s to create rafters, using a roof pitch calculator to determine the appropriate length.
Attach: Attach the rafters to the top plates, using screws or nails.
Roof Sheathing: Lay plywood sheathing over the rafters, securing it with screws or nails.
5. Exterior Sheathing & Siding:
Plywood Sheathing: Cover the walls with plywood sheathing.
Siding: Attach the exterior siding of your choice, following the manufacturer's instructions.
6. Roofing:
Roofing Felt: Install roofing felt over the plywood sheathing.
Shingles: Apply shingles, starting at the bottom and working your way up, following the manufacturer's instructions.
7. Windows & Doors:
Openings: Cut out openings for windows and doors using a circular saw.
Install: Follow the manufacturer's instructions for installing windows and doors.
8. Interior Finishes:
Drywall or Paneling: Cover the interior walls with drywall or paneling.
Paint: Paint the interior and exterior of your shed.
9. Finishing Touches:
Door Hardware: Install door hardware, such as handles, hinges, and a lock.
Trim: Add trim around windows, doors, and the roofline.
Lighting: Consider adding electrical wiring and lights (consult an electrician for this step).
Tips for Saving Money
Shop around: Compare prices for materials from different suppliers.
Use salvaged materials: Check local salvage yards or construction sites for reclaimed lumber.
DIY tasks: Do as much of the work yourself as possible.
Simple design: Opt for a basic shed design to reduce the complexity and material costs.
Consider using less expensive materials: While pressure-treated lumber is important for the foundation, you can use standard lumber for walls and roof to save money.
A Few Words of Wisdom:
Safety First: Always wear safety glasses, gloves, and appropriate clothing when working with power tools and sharp objects.
Read instructions: Carefully follow the instructions for each material and tool you use.
Take breaks: Don't overwork yourself; take breaks to avoid fatigue and accidents.
Enjoy the process: Building a shed is a rewarding experience. Take your time and have fun!
And there you have it! A comprehensive guide to building an 8x10 shed on a budget. With some planning, effort, and a little DIY spirit, you can create a fantastic storage solution that fits your needs and your wallet. Happy building!
No comments:
Post a Comment
Note: Only a member of this blog may post a comment.